Agilent 240FS AA#
The Agilent 240FS can be operated in either flame or furnace mode. The appropriate module must be installed prior to any analysis. Please be sure to request your needed module by contacting Dr. McCurry in advance.
Flame#
Needs a procedure!
UltrAA Graphite Furnace#
Graphite Furnace Atomic Absorption Spectrometer (GFAAS) suitable for trace and ultra-trace metallic elements test, covering over 60 elements. It is highly sensitive, with low limit of detection and less sample volume, especially suitable for testing Cd, Cr, Pb, Al, Mo, etc.Graphite Furnace analysis times are longer than those for Flame sampling, and fewer elements can be determined using GFAA. However, the enhanced sensitivity of GFAA, and its ability to analyze very small samples, significantly expands the capabilities of atomic absorption.
Method Set-up#
Open the SpectrAA software.

Select ‘Worksheet’, then ‘New…’ to create a new method from scratch. (create a name for the method you are making)
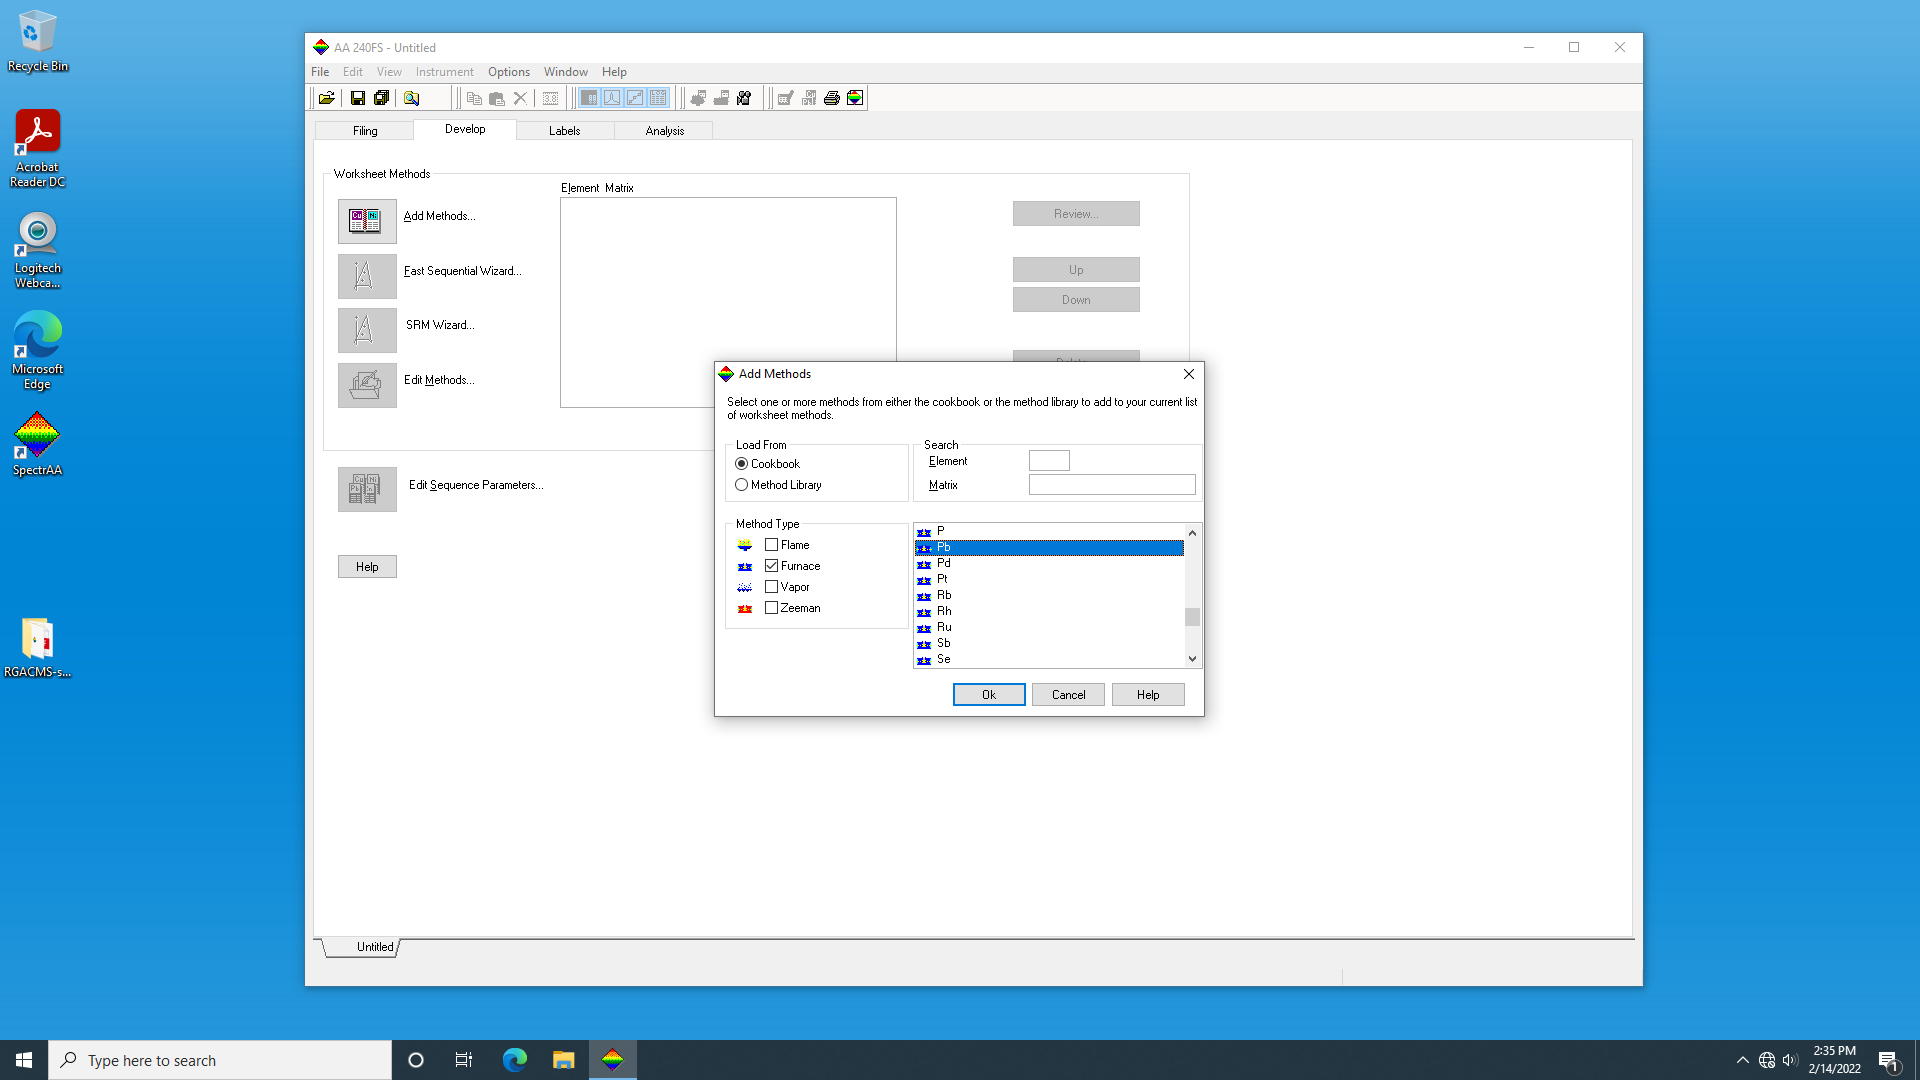
To begin creating a new method, select ‘Add methods…’
For Furnace mode, be sure Furnace is selected in the first pop-up box, select your desired element matrix, and hit ‘Ok’.
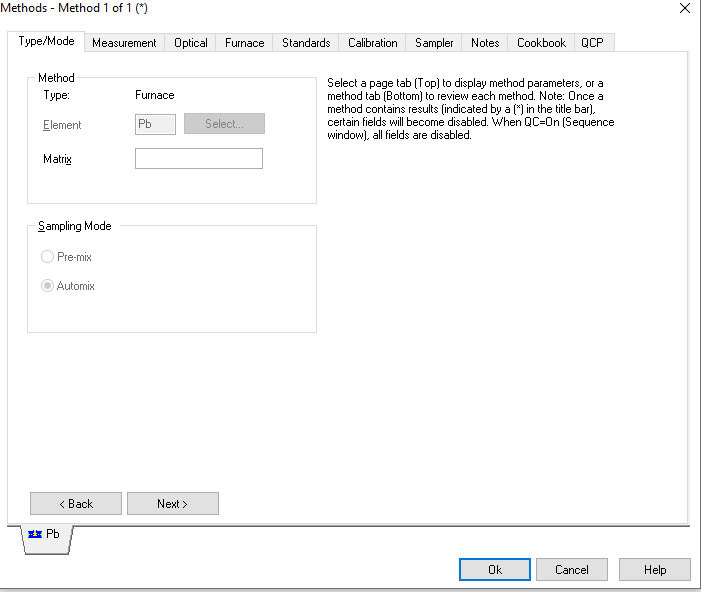
Next, select ‘Edit Methods…’. This is where you can edit each parameter to get the best analyte signal.
The first tab labeled ‘Type/Mode’ is where you can check that you have selected the right element and furnace mode.
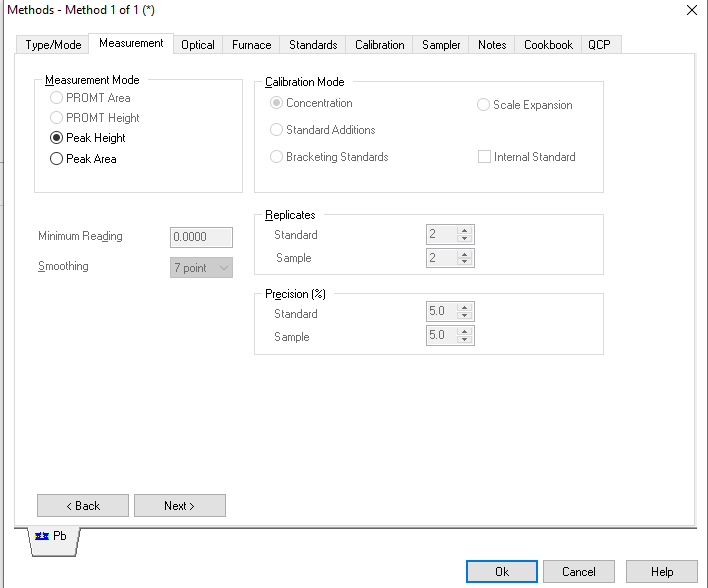
The second tab labeled ‘Measurement’ is where you can select your calibration mode. The most often used is concentration or standard addition.
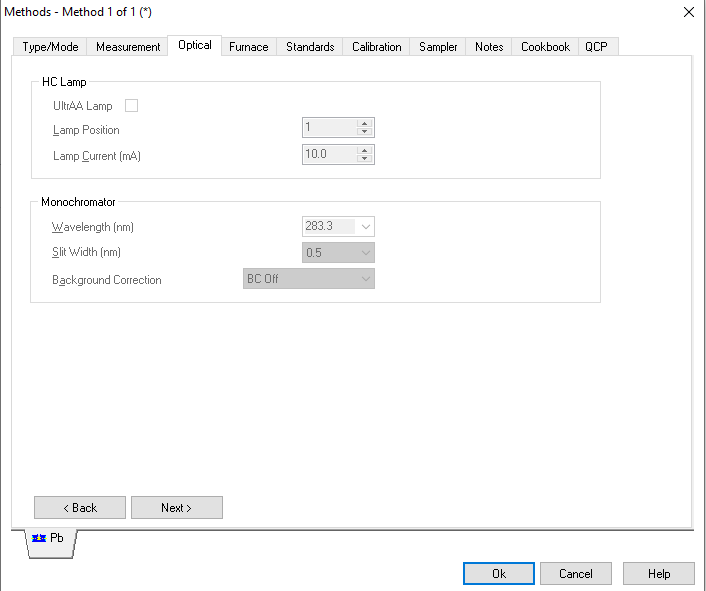
The third tab labeled ‘Optical’ is where you can type in what your desired wavelength and slit width is.
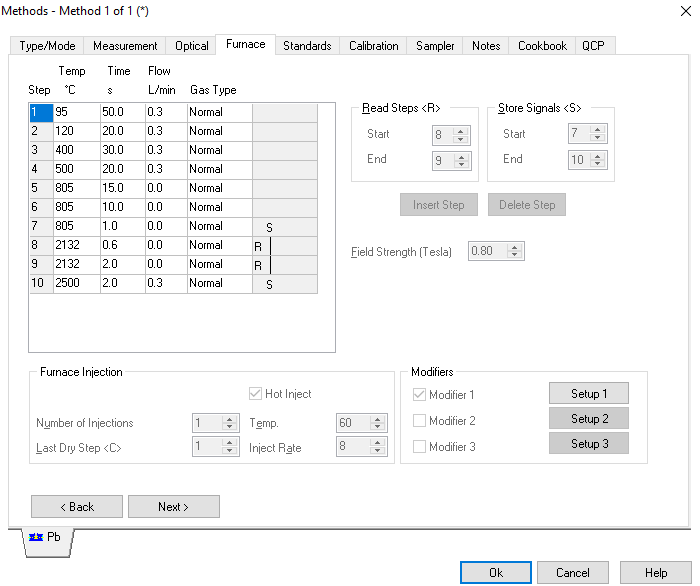
The fourth tab labeled ‘Furnace’ is where you can edit the furnace program to ideal parameters.
Important
To make sure the instrument is reading exactly what you want it to, have the ‘Read Steps (R)’ be at the optimum temperatures for atomization. The ‘Store Signals (S)’ should start one step before and after the Read Steps (R).
The values in the table listed should read exactly from page 3 of the paper manual by the instrument.
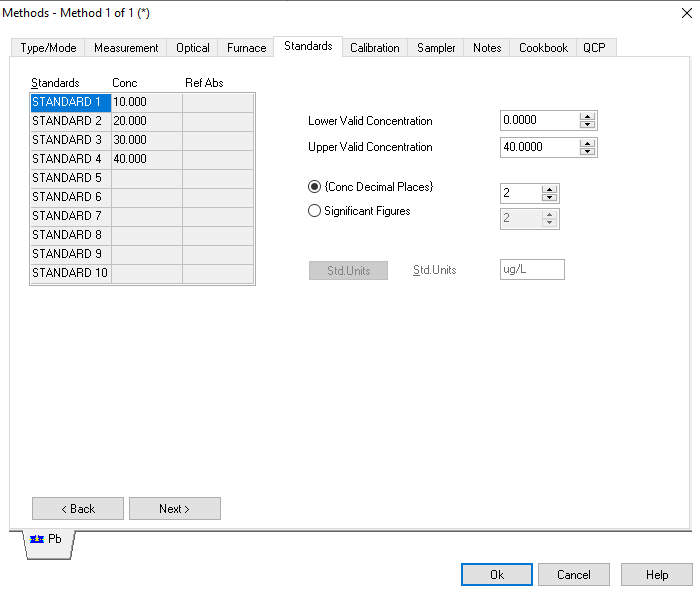
The fifth tab labeled ‘Standards’ is where you can enter your desired concentration steps for the instrument to do for you.
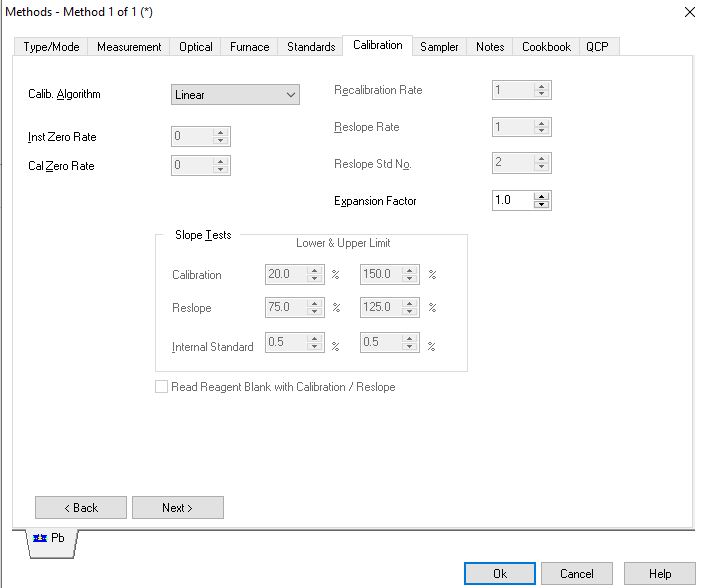
The sixth tab labeled ‘Calibration’ is for you to select what kind of curve you want the instrument to produce, most common is linear.
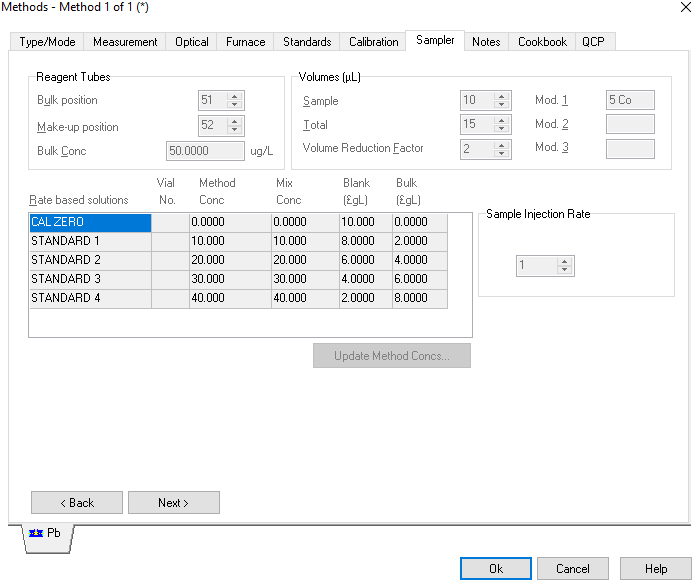
The seventh tab labeled ‘Sampler’ is where you align the instrument with what you put into the sampler. You can enter the numbered position for your analyte, modifier, etc. The sample volume should be entered. The instrument will also show you the concentration dilutions it calculated with the ‘Update Method Concs…’ button.
Note
The rest of the tabs in the method editor can be disregarded unless you would like to enter experiment notes.
Click ‘Ok’ when done editing the method.
Instrument Alignment#
Adjust the light intensity by removing the autosampler/middle case to expose a double knob.
You can open up the light intensity option by clicking on “Furnace Facilities” on the top portion of the software, above “analysis” below “help” and 2nd to last section of icons Or Click “Optomize” on the left panel of the window and you can adjust the lamp and the autosampler through this manner.
Pull up the light intensity monitor on the AligentAA software to reach the maximum intensity possible to reaach the sample
The light source can be adjusted by opening the right most compartment and repositioning the lamp until a maximum intensity is registered.
To move the compartment deeper in into the instrument or out away from the back of the instrument turn the outer knob.
To move the compartment up or down in the space turn the little knob that sticks out of the knob as a whole.
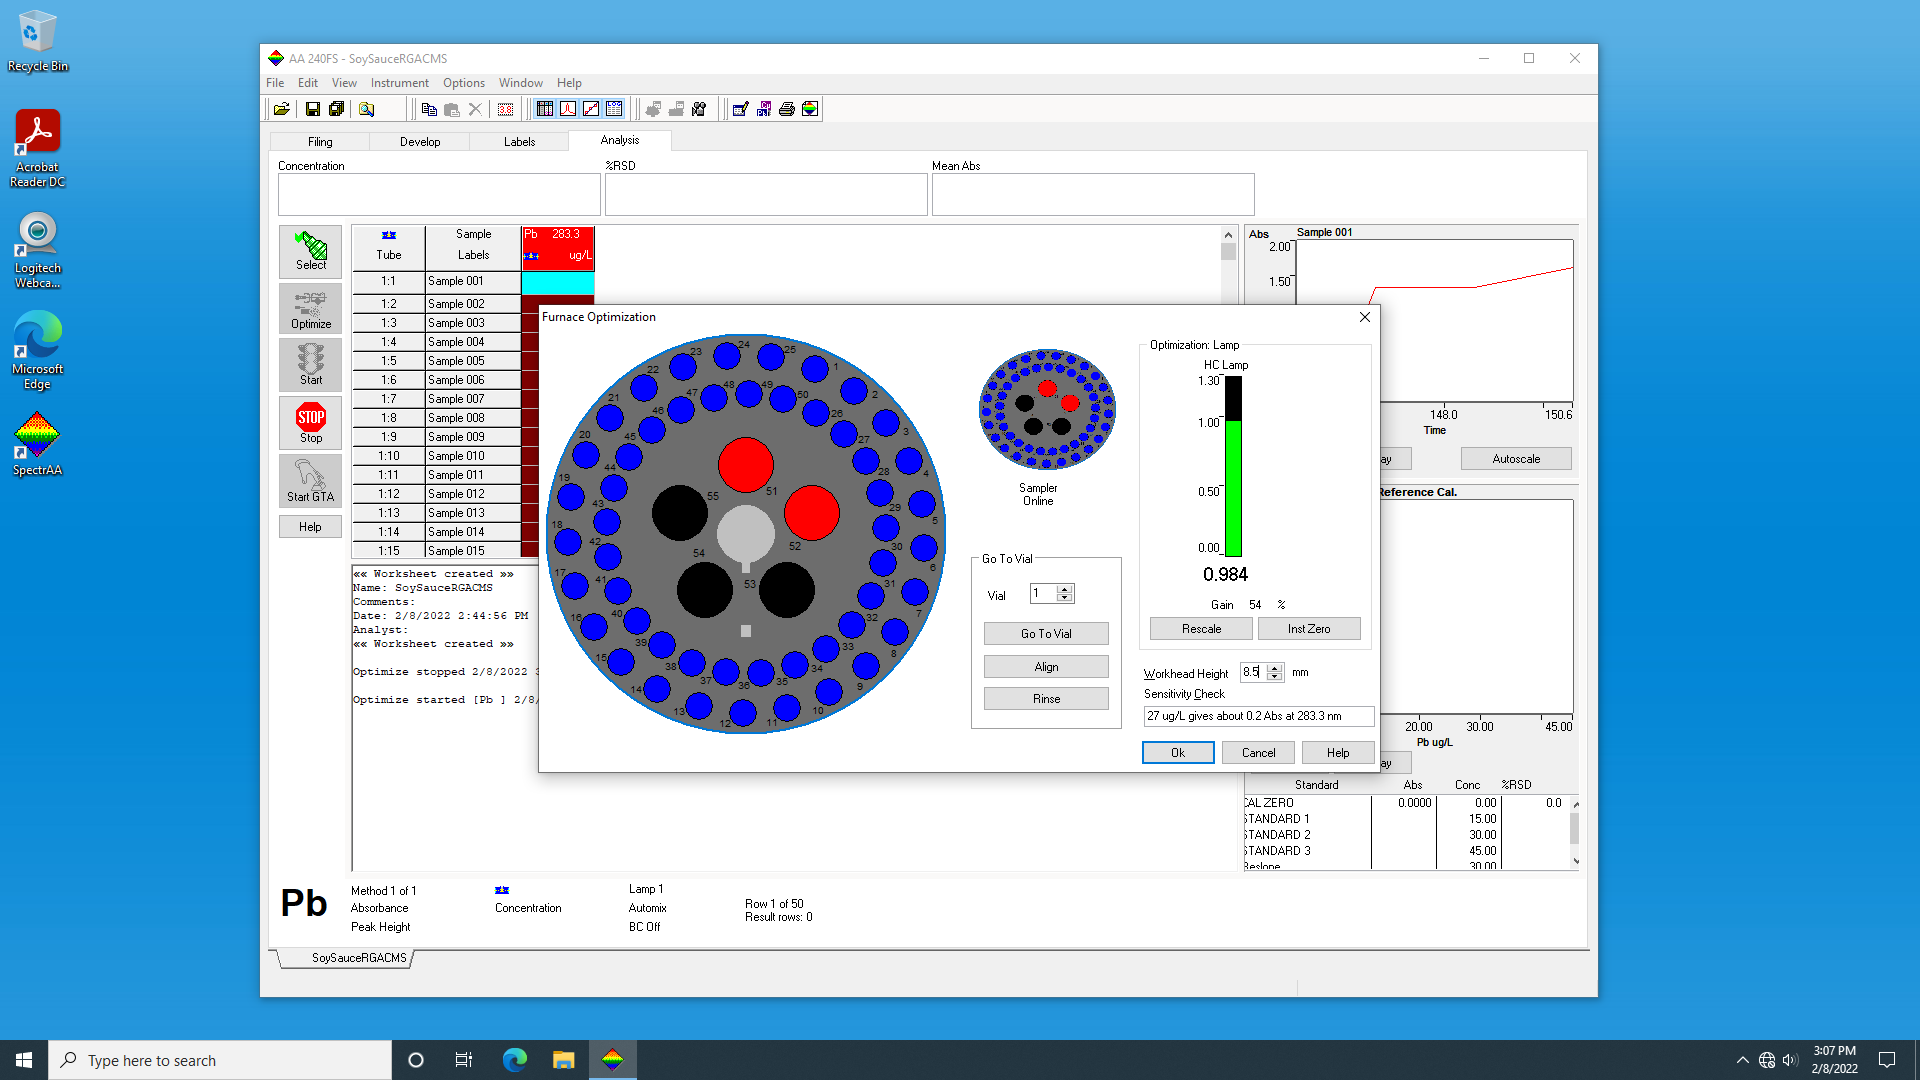
Tip
You may press the rescale button to rescale the intensity to 1 if the intesity is over the value of 1.
To align the arm on the autosampler first unlock the autosampler by the bottom knob on the attachment.
Press align and then optimize on the software. Also bring up the Furnace Video.
The arm will move to the sample cup (position 1) where the draw up tube can be adjusted.
Loosen the tan plastic knob on the arm.The tube should be able to slide in and out of the arm.
Adjust the tube so it touches the botton of the cup and then pull up slightly to get optimal solution intake.
Tighten the tan plastic knob
Press okay and the arm will move to the furnace where it will disperse the solution it uptakes.
Adjust the arm to fit into the opening of the furnace using the knobs on the autosampler.
Use the knob on the right to move the arm into the instrument or back out of the instrument.
Use the knob on the front of the autosampler to move the arm to the left and right
Hint
You need to be able to see the opening to get the tube into the opening so feel free to use the step stool if not tall enough to see it to begin with
Once the arm is adjusted perfectly you should see the tube in the furnace video.
To adjust where the arm and tube are in the furnace use the metal knob (it looks like a screw) to lift the arm up or bring it down so the tube can freely dispense of the solution in the furnace.
To make sure it is going to freely dispense every time lift the arm up manually with your hand, and drop it too see if it goes smoothly into the opening with the metal stopper stopping it at the desired height from the bottom of the graphite tube.
After this is complete lock the autosampler in place by twisting the bottom knob on the instrument.
Press okay and the instrument alignment is complete.
Autosampler#
The casings should be cleaned with concentrated nitrous acid, rinsed with DI water, and dried before use.
The solvent used to dissolve the sample should be placed in the “Make-Up” compartment.
The standard solution should be placed in the “Standard/Reslope” compartment.
Any modifier solutions should be placed in the “Mod/QCP” compartments.
Note
Modifier solutions stabilize volatile analytes at high temps., increase the volatility of the analyte during atomization, and cause matrix contaminants to atomize during the ashing stage. Always use your chemical modifier.
The sample should be placed in “sample compartment 1”
Note
After the Method, Instrument Alignment, and Autosampler are prepared the instrument runs automatically. Once the run is complete, the intrument will turn off automatically. Data can be collected the following day, though it is recommended that you ensure at least one trial completes before leaving.