KUB Ballroom, Room 408 (1, 2, 3)
Lighting Systems
House Lighting
The house lighting has 10 pre-programmed scenes (1-8, MAX, and OFF). Although the house lighting system has occupancy sensors which turn on the lights when it senses motion in the room, a scene must still be activated for an event so that lights do not turn off and on during an event.
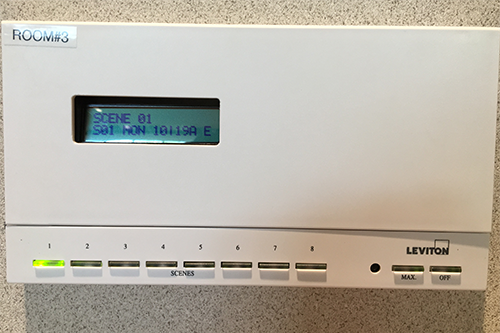
When the Ballroom room separation walls are closed and break the sensor beam on the ceiling, house lighting system control panels in each room will control lights for its respective room.
| Scene | Zone 1 (Inside) Lights |
Zone 2 (Outside) Lights |
Notes |
|---|---|---|---|
| 1 | 75% | 75% | Will produce glare on all screens. |
| 2 | 50% | 50% | Will produce glare on all screens. |
| 3 | 25% | 25% | Will produce glare on all screens. |
| 4 | 25% | 0% (Off) | WILL NOT produce glare on side screens. WILL provide audience lighting. |
| 5 | 50% | 0% (Off) | WILL NOT produce glare on side screens. WILL provide audience lighting. |
| 6 | 0% (Off) | 25% | |
| 7 | 0% (Off) | 50% | |
| 8 | BR 1 = 0% (Off) BR 2&3 = 50% | BR 1 = 0% (Off) BR 2&3 = 50% | Use for presentation on BR 1 main screen. WILL NOT produce glare on side screens. WILL provide audience lighting. |
| MAX | 100% | 100% | Will produce glare on all screens. |
| OFF | OFF | OFF | No lights on. |
Theatrical Lighting (Ballroom Only)
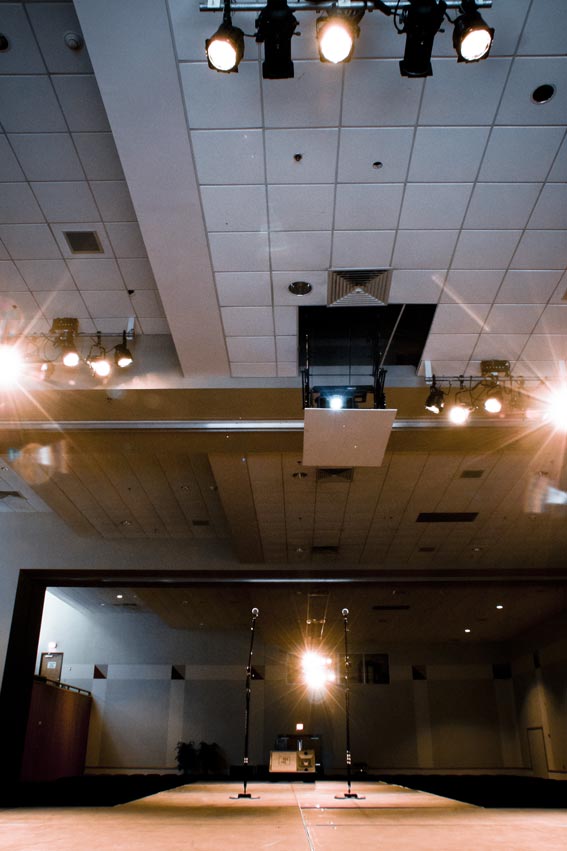
Description: Special permission is required to use this equipment. Available in Ballroom 1 (408-1) only. Technical personnel is REQUIRED for the use and operation of this unit. Lights must be focused using an aerial personnel lift to accommodate event setup prior to start of an event.
Setup Considerations: Requires focusing lights for specific setups or room configurations. Some lights may be used to light lecterns or presentation areas at last minute.
Troubleshooting:
- Is the main breaker powered on completely?
- Is the red/amber rocker switch in dimmer rack turned on?
- Are both cross faders fully upward?
- Is the Main fader fully upward?
- Is the desired fader(s) raised?
Ballroom theatrical lighting is controlled using channels 1-12 ETC Element lighting console.
Resources:
Spotlight
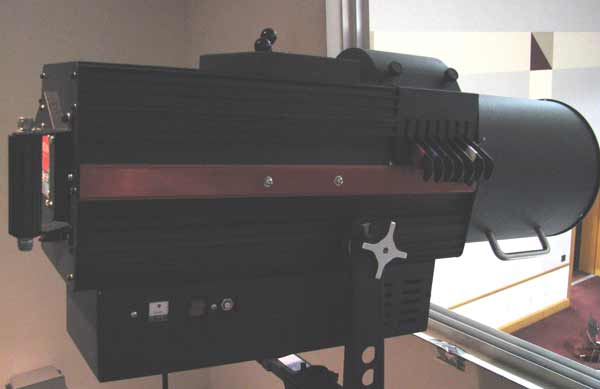
Description: Available only in the Ballroom. Technical personnel is REQUIRED for the use and operation of the Spotlight.
Setup Considerations:
Troubleshooting: If the spotlight has been powered on and the spotlight lamp fails to project light out of the spotlight:
- Turn OFF the spotlight using the red rocker switch located on the right side of the spotlight.
- Unplug the spotlight’s main power cable. Wait 5-10 seconds.
- Re-insert the spotlight’s main power cable into the electrical socket.
- Turn ON the spotlight using the red rocker switch located on the right side of the spotlight.
- Repeat steps one (1) and four (4) until spotlight lamp completely fires.
Sound Systems
System Power
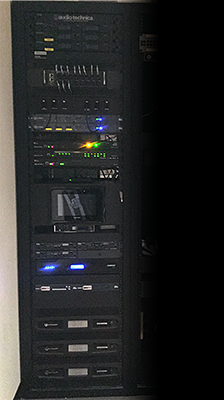
The initial screen on the touchpanel asks if you want to power on the system. If the system does not power on after confirming that the system should be turned on, touch the Power On/Off icon at the top left corner of the touchpad. This should result in the system (audio) powering on.
Determing System Power Status
| System OFF | System ON |
|---|---|
|
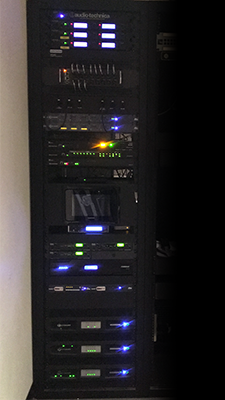
|
Sound System Modes
House Sound System
For the house sound system, all audio is automatically mixed, and eminates from the downward firing ceiling speakers throughout the Ballroom. Audio from video inputs in BR1 will be heard in these room combinations: 1+2+3; 1+2; 1 only. All microphones and DI boxes are plugged into the wall inputs (and floor pocket in BR2) in each ballroom. All audio signals from projection carts are plugged into the AV inputs on the wall panels.
Two wireless Audio Technica microphones are available for each Ballroom - either handheld or lapel (lavalier). When rooms are combined, the wireless microphones for those rooms may be used in the combined rooms. For example:
- 6 wireless mics available - Ballroom 1+2+3 (all rooms combined)
- 4 wireless mics available - Ballroom 1+2; 2 wireless mics available for Ballroom 3
- 2 wireless mics available for Ballroom 1; 4 wireless mics available - Ballroom 2+3
- 2 wireless mics avaialble for each of the Ballrooms 1, 2, and 3 (all rooms separate)
When using the house sound system, you must first set the room configurations.
Set Room Configurations
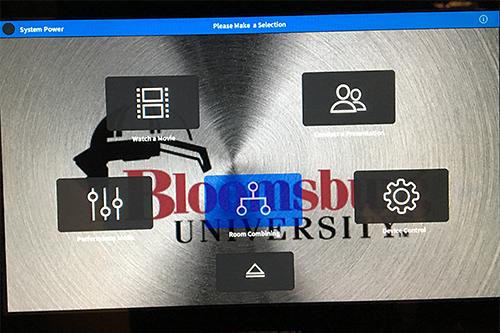
From the touchscreen home page:
- Touch “Room Combining”
- Touch “Combined Modes”
- Choose one of the room combinations that corresponds to how the room is being used:
- Ballroom 1+2+3 (all rooms combined)
- Ballroom 1+2/3 (BR 1+2 combined, BR 3 separate)
- Ballroom 1/2+3 (BR 1 separate, BR 2+3 combined)
- Ballroom 1+3/2 (BR 1+3 combined, BR 2 separate) - THIS WILL NEVER BE USED. THIS OPTION WILL DISAPPEAR ON FUTURE CONTROL PROGRAMMING UPDATES.
- Ballroom 1/2/3 (all rooms separate)
Volumes for input levels may be adjusted using the either the large touchpanel in the projection booth, or the small touchpanels mounted on the walls of each ballroom.
Movie Mode
In Movie Mode, the audio from a video input eminates from the hanging speakers in Ballroom 1. The Danley TH115 subwoofer may be used with the speakers to provide excentuated low frequency audio.
Movie mode should be used with room combination BR 1+2+3, or less optimally, with BR 1+2 only. Movie mode CANNOT be used in BR 1 only, since the sound would bounce directly off of the partition wall, creating interference.
Changing to Movie Mode
From the touchscreen home page:
- IMPORTANT! Combine rooms first! Choose the appropriate room combine mode that corresponds to how the room is being used.
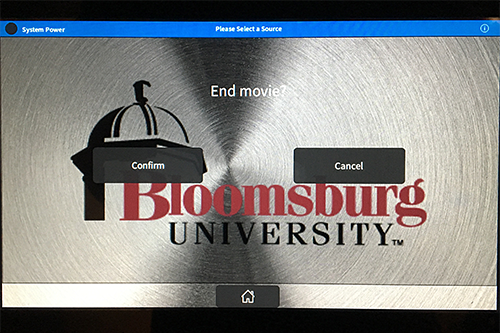
- Room combination must be configured first because you cannot exit the Movie Mode menu without entering a power down sequence (Figure 1).
- Return to the home screen after combining rooms (Figure 2).
- Touch “Watch a Movie”(Figure 2).
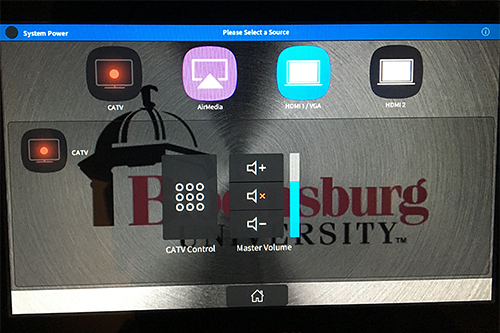
- Select the source from where the movie will be played (Figure 3).
- Place your finger on the desired video source icon (i.e. HDMI 1, HDMI 2).
- With your finger still on the icon, drag the icon to the left side of the screen.
- Release your finger from the icon and touchscreen.
- Adjust volume as necessary (Figure 3).
Performance Sound System
In Performance Mode, all of the audio from video inputs and Ballroom wireless microphones is manually mixed using the Midas M32 console, and eminates from the hanging speakers in Ballroom 1. Stage monitors may be used in this configuartion. The Danley TH115 subwoofer may be used with the speakers to provide excentuated low frequency audio.
Components of the Performance Sound system are:
- Midas M32 console.
- Performance System FOH Stage Rack.
- Four EV TX1152FM 15-inch two-way full-range floor monitors.
- Hanging speakers in BR 1
- Danley TH115 Subwoofer cabinet.
- All 6 ballroom Audio Technica mics are routed to the Midas console.
- Stereo audio from video signals are routed to the Midas console.
Assisted Listening
Video/Projection Systems
Go to the Projection booth. On the Left rack there is a touchscreen. Touch the screen to activate.
POWER ON Main Projector
This process takes approximately three (3) minutes to complete. From the touchscreen home page:
- Touch the “Projector” icon. The screen changes.
- Touch the the top power symbol icon. The main projection screen and main projector in BR 1 will begin to descend. Both will automatically stop at a disignated point. During this time the projector is powering on.
Select Video Inputs
From the touchscreen home page:
- Choose a projector source.
- Press the “AV” button.
- Place your finger on the desired video source icon (i.e. HDMI 1, HDMI 2).
- With your finger still on the icon, drag the icon to the center of the screen.
- Release your finger from the icon and touchscreen.
POWER OFF Main Projector
From the touchscreen home page:
- Touch the “Projector” icon. The screen changes.
- Touch the the bottom icon that looks like a circle with a diagonal line through it. The main projection screen and main projector in BR 1 will begin to ascend. Both will automatically stop at a disignated point. During this time the projector is powering down.
BR1 large projection screen
Room 1, 2, 3 small projection screens
To lower or raise the small projection screen in each room, press either the down or up button.
Sound for Video - Connect a mic cable (XLR) to the wall mic input that says "AV".
Window Blinds
Window blinds for each Ballroom are controlled separately via key switches in each room. The key for this switch is included on the Tech Crew key ring, and is key #H661.
Room Partitions
Known Quirks
"On always lights" - The breaker switch for these lights is in the second breaker box in the hallway behind Husky Lounge from the Health Center. Breaker #15. The #48 key is in the Student Activities key box.
One auxiliary AC power feed is located in Ballroom 1, stage right (door open view, door closed view). Another auxiliary AC power feed is located in the mechanical room on the other side of the small wooden door in Ballroom 3. The Ballroom 3 auxiliary AC power feed must be activated by going into the mechanical room, turning on the 60Amp breaker, and then turning on the master power switch for this location's feed. Ballroom 1 auxiliary AC power feed doe not need to be activated. See also Other Equipment from inventory.
